Saturday, December 24, 2016

The Ruderman Family Annual Christmas Card & Antics... 2016


The Annual Ruderman Family Christmas Card 2016

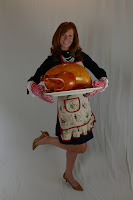
By profession, I am a graphic designer... the photography is always the tough part.  I have a very rough set up in our basement where the fun begins.  Using a tripod, I take a number of shots of each one of us with different expressions and positions (I'm warning you now - friend to friend - DO NOT  try this without a room full of good sports!). 


When I make it back to the computer, I use Adobe Photoshop and drop us into a background made up other photos...


Then I add a few finishing touches...


AND VOILA'... for your enjoyment (and hopefully laughter) we have...

The Ruderman Family Christmas Card 2016

Wishing you all a Christmas story filled with love and laughter!


Wednesday, May 11, 2016

Origami Star Lantern - Oh, the Joy!

Along with my love of crafting, I love to travel!  Oh the sites you see when you go where you haven't been before!!

The first time I visited a German Christmas Market, I fell in love.  Everything twinkled and sparkled soooo... 


One of the things I adored were these beautiful origami star lanterns.  Their incandescent light was magical and their fiery brilliance just sparked something inside of me.. Glee!! I just love them!!

 
When trying to decide on another merry decoration for my fiesta, the twinkling joy they gave was something I hadn't forgotten.

I've wanted to try to make them ever since and quite frankly if I had realized how each they were to make, I may have been an expert by now!  I still have some tweaking to do, and I can tell that practice will make perfect however, I'm happy to share a tutorial so you can share in the cheer too!

The supplies needed are very basic:

Fun or fabulous card stock.  *If you only have a basic card stock, you can always decorate after you have designed your star.  
Scissors
Glue
Hole punch
String, ribbon or fishing line
5 copies of star template *I'm attaching one here for you.  This template makes a large star, approximately 16 inches around.


Begin by printing 5 copies of the template I've provided above on 8 1/2 x 11 card stock of your choice.  


 Next, each template from the card stock.  Cut only along the solid lines.


Once your five templates have been cut, you'll begin folding along the dotted lines.  I've found it easiest to begin each by folding down the center dotted line first.  Make sure you put the printing on the inside of your folding so it will be hidden when your star is complete.


When you are finished folding, you will glue each section into a cone shape.  Make sure you glue the tab inside the cone, to keep the clean lines for the outside of the star.  


When you are finished gluing, you will have five cone shapes ready to glue together.  If you want to get fancy with your hole punch, now is the time to do it.  Each section (when folded) will lay nice and flat so holes can be punched evenly all the way through both sides.  


 Now you'll begin to glue the piece together to create your star.  I highly recommend using patience and regular glue over hot glue.  The hot glue seals quickly and mistakes aren't easily repaired.  *says a girl who knows... To begin, pick two cones up and glue them together by gluing two tabs inside the partner cones "non-tabbed" side.  Make sure that you glue the tabs inside the cone, giving the outside of your star, clean lines.


You'll continue gluing all your cones together until all five are connected, with the exception of 1/2 of one side of your fifth cone.   All the tutorials I've read say to leave this open entirely so you can insert a light.  If this is what you'd like to do, then please do.   You'll want to thread string about three quarters of a way up your cone on both sides, insert the light, then tie the thread around the base of the light tightly, also tightening the star into shape.  I haven't done that just yet...because I found another alternative I'm fairly in love with... Instead, I leave about 1/2 of one side unglued so I can wrap copper-wired fairy lights around my star and insert the fairy lights little battery pack into the star.  This way the battery is hidden, but is easily turned on and off without the wires you need to plug into an outlet!  I will say that I do adore the way the lanterns are lit from within..but if plugs are a problem for outdoors parties, etc.. then I say this is a clever little alternative! 


Finally, add your fairy lights and clear fishing line or lovely ribbon to hang...


Your imagination is the only limit!  
 

If I ever go missing, look for me at a German Christmas Market.. 
I'm fairly certain I'll be the girl in the booth with all the sparkling stars... 

Prost!! 

Saturday, May 7, 2016

Rose is a Rose is a Rose is a Rose..


 I have fond childhood memories of paper roses.  Both the Texas State Fair and Six Flags over Texas had a Mexico section.  In this section, were the biggest most beautiful paper roses I have ever seen.  I wasn't much of a roller coaster fan, but you couldn't keep me away from these attractions!  Why?  BECAUSE.. I had to have a paper rose!

When I was planning my Cinco de Mayo party, they were the first thing to come to mind (after my Pinata of course).  I set about learning how to make them and couldn't believe how incredibly easy they are!  Anyone could make these and have tons of fun!

Here is the simple how to:

Start with card stock, and a template for the rose.

You can make the roses any size, but for the simple sake of using an 8 1/2 x 11 sheet of card stock, I only made small, medium and large.  Here are the templates I used.

Small

Large
Medium

I find it easiest to use a heavy card stock although I did choose to use a thinner card stock when making multiples so I could cut quite a few at the same time.  The more careful you are when you cut, the cleaner your edges will be when you finish your rose.


In order to keep the template stable while you're cutting, staple the template to the card stock first and then cut the spiraled line and edge with the stapled section off last.


Roll from the outside in.  It's easiest to start your roll using a pencil.


Once you've begun, take out the pencil and restart the roll a little tighter.  Keep the roll tight as you go.  Keep on rolling until there is nothing left to roll.


Next, add a dollop of glue to the base and you're done!


I found that gluing a pearl or rhinestone to the center gives it even more charm!

Once you're done, there is no limit to what you can do with your roses!


 Have a beautiful day, my friends!  Happy crafting!!


Friday, May 6, 2016

It's Not A Party Without A Piñata!


I adore Piñatas!  Who doesn't?  They take most of us back to a day where there was excitement in the air and treasures on the ground!

Piñatas are traced back to many cultures and customs, but my favorite is a fiesta!  I play a game called "Pokeno" with long time friends and neighbors.  Each year we each host a party once.  Mine just happened to fall on May 5th this year.. Cinco de Mayo!  The Texan in me couldn't resist a fiesta, so where to start?  A pinata? Of course!!

It was quite the process, but I loved the results and had so much fun doing it!  If you're interested, read on and I'll share the "how to"! 


Start by finding a design you like. 

What you'll need:

A design idea and/or template
Two Cereal Boxes
Poster Board or Additional Large Cereal Boxes
Two cardboard toilet paper rolls (if creating an animal)
One large Zip Tie or Heavy Duty String
Scissors
Packing Tape
Ruler
Tissue paper or tissue streamers in multiple colors

First, cut apart two super sized cereal boxes and lay them flat.  They are the perfect material to work with.  Lightweight and easy to cut.  If you aren't the "artist" type, you can find many free templates online just by googling the design name and the word template.  For instance.. donkey template.

Once you have your design idea, sketch it onto the cereal box. You can mark it up as much as you need to in order to get it just right.  No one will ever see your drawing!

After you sketch the design, place the two flattened cereal box sides together and cut. If this is difficult, cut one then use the other as the template so you'll have two identical size and shape sides.

Next, cut a four inch wide strip long enough to go around the entire outside of your design.  Tape this strip between the two sides using the packing tape.


Once you have your 3d design, you'll want to cut a 3 sided hole either in the top or the bottom of your design, large enough to place your candy and tokens inside.  Leave it open for now.


If you have chosen an animal design, you can easily make ears by cutting a slit in the toilet paper roll and taping it into a pleasing shape.  Secure in place with packing tape.

 
Now, punch two holes in either side of your design.  Place a zip tie or heavy duty string through these holes and secure in order to create a hanger.  You'll want to make sure it's centered in a place that will hold your design evenly.  
 

You are ready to decorate and fill your pinata!

Create ruffles by cutting strips of tissue paper or using crepe paper streamers.  To give it an authentic effect you'll want to cut slits in the strips before applying.


 Be sure to pay attention to and cover the underside of your design.


Start at the bottom of your pinata and work your way up the design, gluing strip over strip.


Once you've decorated your design up to the hole, fill your pinata with fun candy or tokens.  It's your party, run with it!  If you're planning an outside party, how festive would confetti or glitter mixed in with your treats be?!   When full, tape securely shut and continue decorating until you have covered the entire design.


Glue on eyes made on a color printer or other fun accessories at this time.  I think streamers could be a fabulous addition!

 
Now all you need is a heavy duty string to hang, a large stick  and some fun friends to help you break open the fun!


Viva Fiesta!
I truly hope your party is brilliant, my friends!