
Groundhog's day actually originated as a custom of the clergy in Europe.
Every February 2nd, the clergy would bless candles and people
would put them in their windows to ward off the
dark and cold of winter.

In addition, the weather on Candlemas was thought to predict the rest of the season.
A poem that came down with this tradition,
"If Candlemas Day be fair and bright
Winter will have another fight.
If Candlemas Day brings cloud and rain,
Winter won't come again.”
Alongside this tradition, the townspeople would study the astute hedgehog.
If the wise hedgehog came out of its hole on a sunless day
and didn't see its shadow, it would stay outside.
But if it was a sunny
day, it would see its shadow and return to his hole
for six more
weeks of winter!
So there it is..
Some time in the early 1800's, German settlers in Punxsutawney, Pennsylvania
started looking for groundhogs (substituted for hedgehogs) on Candlemas,
hence Groundhogs Day as we know it
started looking for groundhogs (substituted for hedgehogs) on Candlemas,
hence Groundhogs Day as we know it
and another firm reason for a holiday as I see it!
This story along with the fact that I love any excuse to eat a cake, began my tradition of serving a Groundhog Day cake to my family every February 2nd.
This cake amuses me to make and I find it especially fun to eat on days
the groundhog has predicted six more weeks of winter!
The details:
First, I prepare my favorite cake and pour it carefully into a
glass baking bowl that I've sprayed
glass baking bowl that I've sprayed
from top to bottom with non stick cooking spray.

I like to use a Pampered Chef Baking Bowl. After several years of trial and error, because I know it's the perfect size for my groundhog cake.

Next, I pour the cake batter into the bowl and bake it in a preheated oven for about 50 minutes or until a thin knife inserted down the middle comes out clean.

After I take it out of the oven, I let it cool in its bowl for about 20 minutes which makes it easy to tip over and ease from the bowl in one piece.
When it's cool to the touch, I place it on a plate, I've covered with a
sheet of parchment paper and freeze for another 30 minutes.
I've found that this extra cooling it makes it nice and sturdy for trimming and decorating.
While I am waiting for the cake to cool, I like to prepare the decorations.
First, I take an 8 inch cake round and trim it about 1/4 of an inch all the way around.

Next, I push it into an 8" high terracotta flower pot until
it sits securely on the inner ledge.

I like to add a paper doily on top of the cardboard. It will just peek out
once the cake is decorated and I think it
gives it a fabulous little finishing touch!

After the pot is ready, I like to get my decorations in order.
I mix up a standard chocolate buttercream frosting and set it aside.
Next, I'll crush a handful of my favorite cookies...
I find that the easiest way to crush the cookies finely,
is to insert them in a plastic bag and give them a good hammering.

When that's completed, I pull out a couple of small chocolate candies
for the eyes and a larger one for the nose.
I also pull out a flower for the top of the cake. A silk flower will do
the trick here, but I adore these cute icing daisies by Wilton.

When the cake in nice and firm, I remove it from the freezer and
evenly slice off the misshaped top to give it a flat surface.
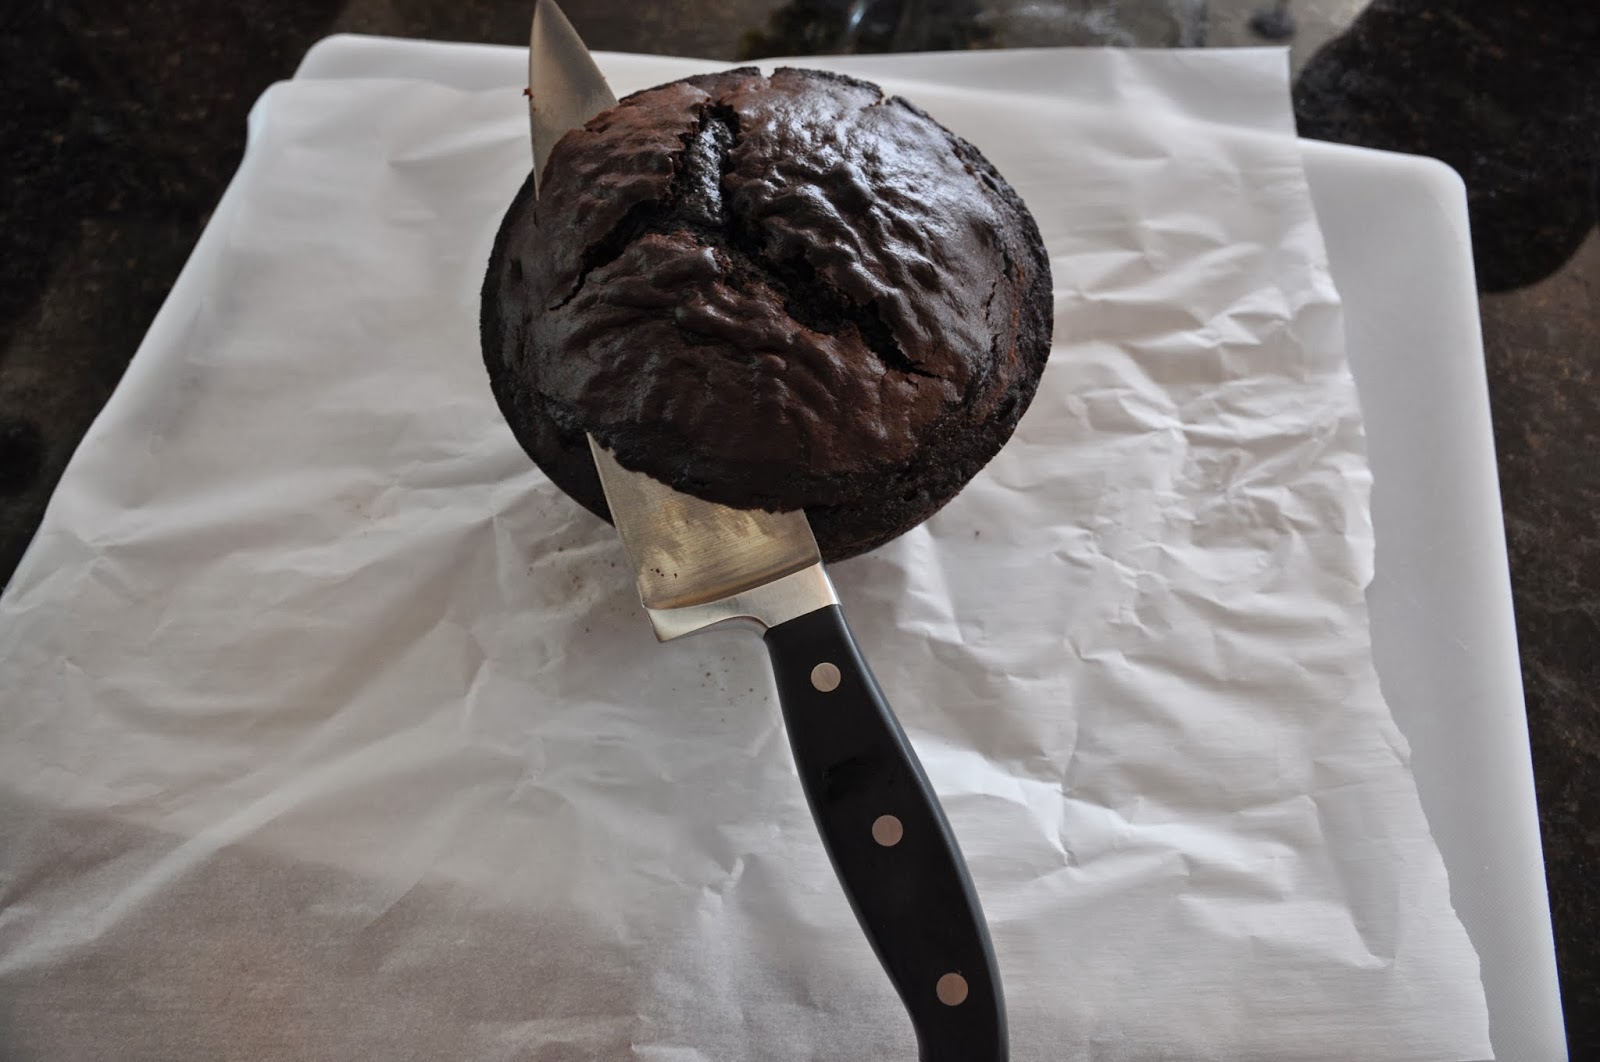
Next, I flip it over and place the large side down in the prepared flower pot.

Now the real fun begins!
I like to frost the cake using a Wilton decorator. I personally think a decorator tip gives the groundhog a nice texture. I use this big star because it's super simple and I'm done in seconds, however there are so many fun fur type tips that could be used.

I start by frosting stars at the bottom of the cake and work my way around in a circle.
When I'm done, I will have completely covered the
cake in frosting stars from bottom to top.

Once the cake frosting is completed, I move quickly to add the eyes and nose before the icing hardens. I insert the eyes first, widely apart. Just before adding the nose, I build up the area with extra frosting to give him a snout. Finally, I add the crushed cookies and flower to the top and frost little paws to the side of the pot to give him the appearance of peeking from his lair.

Now that my cake is finished, I will tuck him away until morning
when I''ll place a sign in his paw predicting our weather for the next six weeks!
*Of course, the choice is entirely up to the real Punxsutawney Phil!
I made these cute little signs out of Sculpey a couple of years ago
and keep them for Phil's use year to year.
*If you have never used Sculpey, you must!
It's so clever and painless to craft with, but that is a blog for another day!

I must tell you that it's a fun site to watch sleepy eyed family members pop into the kitchen for breakfast and to see old Phil and his prediction...
well worth the effort!

Happy Groundhog Day, friends!
That is ridiculously cute! Fun facts about the history of the day.
ReplyDeleteI think you get better with him every year! Maybe someday I will give it a whirl!
ReplyDeleteLove it! thank you for the information, history and baking tips!~~~
ReplyDeleteThank you all so much! He was ridiculously fun to make and I didn't find an ounce of guilt eating him with a forecast like 6 more weeks of winter! HA!
ReplyDelete